File Inbox
To get into the files section, click on the Files listing found in the left side of the screen.

The diverted page will take you to the Files section.
In Hand
In Hand section displays files that are currently waiting for your action. You will find the files listed with few basic details for a better overview. Each file is displayed with
Detailed view

- File details- It includes received date, priority details, category, subject, section, etc.
- Notification- Count of remaining drafts for approval and approved drafts will always get displayed with the file.
- Action items- If you click on the Actions button, few action items appear.
File Highlights

Timeline option allows you to view the timeline of the file from creation till current location
Add To Watchlist allows you to mark the file to watchlist section from where you can click and find the movements and actions on the file.
Life cycle allows you to understand the complete life cycle details of a file.
Movement History allows you to understand the complete movement of the file.
Linked Files allows you to understand the list of files that are attached to it
Confidential allows you to set privacy for a particular file.
Shared allows you to share the file by seat or by email.
No. of Despatches indicates the number of items that are despatched.
No. of Documents indicates the number of documents created from approved draft.
Remarks indicates the comments that are written for a file.
Due Date indicates the date on which file falls due.
Action Items:
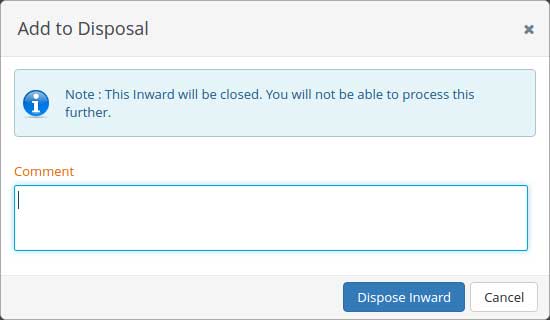
View Despatchs
When we clink in to the view despatch menu we can see the despatches list.
Search box is provided to select a particular despatch.
View Inward
When we clink in to the view inward menu we can see the inward list.
Search box is provided to select a particular inward.
History
By clicking in to the History menu we can see the list of activities happened in that file.
Search box is provided.
List view and Refresh page button is also present in the file listing page.
Search filter is also provided. It will help you to search for a particular file from in hand.
Create File
Click on the Create File tab and fill in the file information to create a new file.

- If the file number has to be assigned manually, tick in the Digitized File? Option. Add file number field will appear on the screen where you can enter the file number.
- Fill the mandatory fields to proceed further. (Mandatory fields are those that are highlighted in orange colour)
- Select the Category/attributes and click on the create file button. As per the selected category, related fields will appear on the screen.
Once the file is created, it appears on the In hand section of the creator.
In Hierarchy
This section contains files that are residing with users who fall under your hierarchy. In case of necessity, you can pull back the sent file and provide a valid reason for it. This can be used in case of emergency or in absence of that user.

Movement History: Refer In Hand
Life cycle: Refer In Hand
Parked
This section contains files that are kept aside for later action. Files that cannot be processed instantly can be moved to the parked section.

To park a file, select the required file and click in the Park option that appears at the end of the screen. It will automatically get added to the parked section.
You can unpark any file once you are ready to process it by clicking in to the unpark button after selecting the file.
Movement History: Refer In Hand
Life cycle: Refer In Hand
Manage folders:We can create a new folder here and can park that file to the specified folder.
Search filter:Search filter is also provided to search a particular parked file.
Refresh tab is provided to refresh the page.
Track
The current status of any file that has been forwarded from you will appear here in this section and can create a part file for that particular file. Current location can be viewed from this section.
Create Part File :If a file needs to get process in one or more ways , we can create a part file for it by clicking in to the create part file button.

Movement History: Refer In Hand
Life cycle: Refer In Hand
Viewed/ not viewed status will be available for each file.
Search filter is also provided to search a particular file.
Shared with me
Files that are shared to you by other users will appear here in this section.

Shared by me
Files that you share with other users appear here in this section.
 Life cycle: Refer In Hand
Returns by me
Files that are shared to you by other users will appear here in this section.

Returned to me
Your shared files that comes back after processing appear here in this section.

Movement History: Refer In Hand
Life cycle: Refer In Hand
Watchlist
The files that you add to the watchlist appear here in this section. Anytime you can click and view its status..

Movement History: Refer In Hand
Life cycle: Refer In Hand
When you click open a file, it opens up with some tabs.

Attachment
We can attach various documents related to that file with the help of add document button.
We can also add Stock files and MOM.
We can categorize each documents under each category from the Information tab available in the right side.
Preview of the attached documents will be available in the preview tab.
We can enter various comments in the comment section.
We can add Different attachment tags with the help of add tag menu.
On the file view section, few action items and viewer options are available for convenient collaboration and access.

These buttons divert you to the beginning and ending page of the document.
These buttons help you to move along the document by every page.
Zoom in option to have a closer look into the document
Zoom out option to have a wholesome view of the page.
Fit screen option to make the whole document fit within the screen frame.
Fit width option to increase the document width Original size option to view the document in its original size.
Full Screen option to view the document in full screen mode.
Pan option is to drag the images/documents.
Single Page View option is used to restrict the documents in a single page.
Scroll View is used to scroll the documents.
Stamping feature allows you to add stamps on the inward.Any organisation specific stamp can be added in to the system for regular usage.
Download option is to download the documents.
Icons that helps you to rotate the document or image.
Annotation option helps you to mark a particular section inside the document and provide a comment or explanation to it. This icon is used to enable the Annotation. Click on this option to add Annotations.
Redact option helps you to hide a particular section inside the document and make it available only for selected users. When redact is enabled, other users cannot view the content available in that area.
Notes Section

Note section displays comments or notes made on the document by different users. The comments will appear in chronological order along with time stamp for a better understanding.
You can add your notes in the editor section and click on the Submit Note button.
You can also add Note attachments to the file in this section.
Action items available in the note:
File Remarks:
We can add remarks in the add remarks section.
A check box is provided to make it visible to all or not.
After entering the remarks save it.
File Tags:
We can tag a file with keywords. These tags will be utilized while searching.
Mark as confidential:
By selecting the organization,seats and departments and save it. By this way we can manage confidentiality of a file.
Lock:
Lock option is provided to lock a file.
Documents Needed List:
It shows the list of documents needed for a file based on the category.
If any of the document is not uploaded it will indicate as red.
Action Item:
This is to provide due date.
Here we can add a due date by clicking in to the Add due date button.
All the action items will be listed here.
Search filter is provided to search a particular action item.
We can also add new action items from the New Action Item tab.
Enter the mandatory details and save.
Action items available in the editor:
Insert Bookmark:
We can add bookmark references by clicking in to the Insert bookmark menu.
Enter the details and press insert button.
Insert annotated images:
We can add annotation references by clicking in to the Insert annotated images menu.
Insert annotated images
Insert Note References:
Enter the note paragraph references and press OK.
Rupee symbol:
We can insert rupee symbol by clicking in to it.
DDFS user:
When we click on to the DDFS user menu, the name of the user will be displayed in the editor screen.
Place Holder:
When we click on to the place holder button, a window will appear.
Then select a place holder to insert and press OK.
DDFS implementation logo:
When we click on to the DDFS implementation logo, it will be displayed in the editor screen.
Change Language:
We can change the language by clicking in to the 'm' symbol.
Tokens:
Some commonly used tockens are saved in this menu. We can use these tokens at the time of draft creation.
Preview:
We can see the preview by clicking in to the preview button.
Remove Format:
We can remove or change the current format by clicking in to the Remove Format button.
- Cut option is there to cut something from the document.
- Copy Option is there to copy the data.
- Paste option is available to paste some data. We can paste it as plain text or from word.
- Undo option is available to remove the previous activity. We can make the letters as bold, italics, and can provide underline and subscript.
- We can inset or remove numbered list.
- We can insert or remove bulleted list.
- We can increase or decrese the indent.
- We can allign the documents in left,right,center & justify.
- We can inset table by clicking in to the table menu.
- We can insert horizontal lines between each documents/ paragraphs by clicking in to the insert horizontal line button.
- We can insert special charachters by clicking in to the Special character button.
- We can insert page break for printing by clicking in to the page break button .
- We can insert images by clicking in to the insert image button.
- We can change the formatting style by clicking in to the styles button.
- We can change the paragraph format by clicking in to the paragraph format menu.
- We can change the font by clicking in to the 'Font Name' menu.
- We can change the font size by clicking in to the 'Font Size' button.
- We can provide colour to the text and background by clicking in to the Text Colour and Background Colour button.
Note File All the notes that are added to the selected document will appear in chronological order is listed here.
Note attachments The attachments added along with the notes can be viewed here.
All Items When you click on this, the document, its attachments and other referred documents will appear in a list.
You can view it inline while preparing the notes.
File view

Displays the file along with notes.
Notes view

Displays all the notes that are made on the file in chronological order for better understanding.
Compare view

Compare option lets you to compare different pages of the same document
Scratchpad
Scratchpad lets you write pre-notes and other comments or summary that can be attached to the file. Unlike notes, scratchpad attachments can be deleted from the file. A short note to the next user can be send in scratchpad.

References

It displays the relationship of the current file with respect to the information.
- Link Reference

We can link other files in to the selected file with the help attach button.
Detach option is also provided to detach a file from the current file.
Search option is provided to search for a particular file.
- Repository Reference

We can repository references to the selected file with the help of attach button.
Detach option is also provided to detach a file from the current file.
Search option is provided to search for a particular file.
- List Back Files

The files that are deleted will be listed under list back file section.
We can attach a back file reference to the selected file with the help of attach button.
Detach option is also provided to detach a file from the current file.
- List Merged Files

The files that are merged with the current file will be listed under list merged file menu.
We can attach a merged file reference to the selected file with the help of attach button.
Detach option is also provided to detach a file from the current file.
Search option is provided to search for a particular merged file reference.
- List Document References

The list of document references will be available under this tab.
We can attach document references to the selected file with the help of attach button.
Detach option is also provided to detach a file from the current file.
Search option is provided to search for a particular document reference.
Despatch

All the despatched items will be listed under list despatch tab.
Search option is provided to search for a particular despatch.
We can add despatch by clicking in to the Add new despatch menu.
Here we can despatch the document either through DDFS despatch or by General Despatch
DDFS despatch
-
Select the documents that needs to be despatched from the select box.
-
Enter the despatch details.
-
Select the seats to which the items are despatched.
-
Some default despatch seats are there or we can add new seat from all seats.Then click on to the despatch button.
General Despatch
-
Select the documents that needs to be despatched from the select box.
-
Enter the despatch details.
-
Select the seats to which the items are despatched.
-
Some default despatch seats are there or we can add new seat from all seats.
-
Fill in the despatch details, select the mode, and enter the address. We can also add some new address. Then click on to the despatch button.
By entering the official email address and message we can despach it through email.
Inwards

The Inwards will be listed under this tab.
Search option is provided to search for a particular inward.
History

All the file history and Registry permission history will be available under the history menu.
Search option is provided to search for a specific history.
Relationships
In this section, you can find the related files and documents of the current file. Its parent file, reference documents, etc. will appear here in this section.
We can also add relation by clicking in to the add relation menu.
Search for a particular folder, select that folder and click add relation button.
Common Actions for File processing
The file can be processed to as many seats and departments required, for processing. It can be done manually by sending the file to the required seat after every process.
Forward
We can Forward a file to a person within our hierarchy. Select the department and user then press forward.
Forward++

We can forward a file outside the specified department or outside the hierarchy.
Select the department and user then press forward++.
Share

We can share a file to multiple users by clicking in to the share button.
It can be shared by seat or by e-mail.
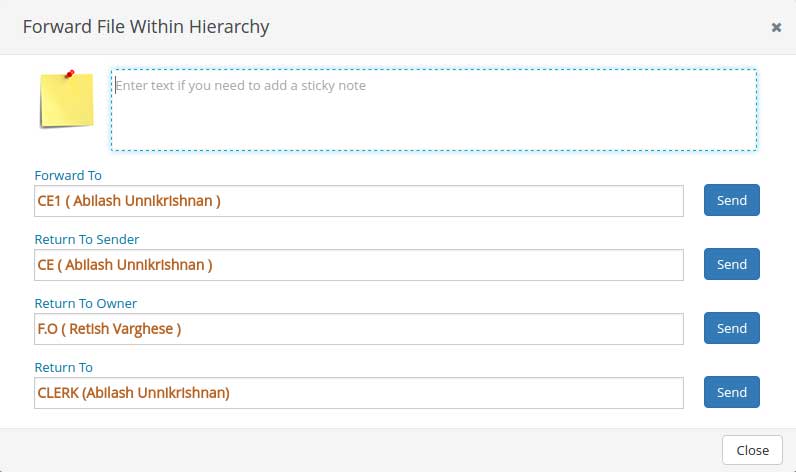
Return

We can return a file to the Sender or Owner.
Pull

We can Pull a file back, if that file is residing with the user below our hierarchy and it is not viewed by the user.
Add to Workflow

In case the file has to be added to a workflow, Click on the Attach to Workflow button at the bottom of the screen. Select the required workflow in the pop-up box and click on the Attach button.
When you add the file to certain workflow, the file will move only in the order assigned.
Draft Creation

Once the file is completely processed, draft can be created.
In order to create a draft, click on the âAdd Draftâ tab in draft section.
Some guidelines are displayed on the right and a notes view on the left.
The user can select a format for the draft from the template selector drop-down.
Based on the selection, some fields appear on the screen to be filled. After entering the details press save.
We can change the Page alignment and paragraph alignment.
Print in letterhead option is also available. After editing press Save print option to save the details.
A preview of the document can be viewed before sending it for approval by clicking in to the preview button.
Draft Approval

The approver can use the approve button at the bottom of the screen to approve the draft.
Stamping can also be used to approve.
The created draft will be listed in the draft listing menu.
Search option is provided to search for a particular draft.
Trash: All the deleted drafts will be available in the trash.
Document Creation

Documents can be created from approved drafts just by clicking on the Create Document button.
The final document will be created and get attached to the file and it will be listed under the documents menu.
Document Highlights:-

Clone draft:

We can clone a copy of draft with in the file or clone a copy to another file by clicking in to the clone button.
Search option is provided to search for a particular file.
Despatch as internal message:

We can despatch the document as internal message by clicking in to the Despatch as internal message button.
A window will appear enter/ select the necessary details and press despatch button.
List document attachments:

We can see the attached documents by clicking in to the List document attachments button.
Download as word document:
We can download the document as word by clicking in to the Download as word document button.
Draft history:

We can see the history by clicking in to the Draft history menu.
Search option is provided to search for a particular document.